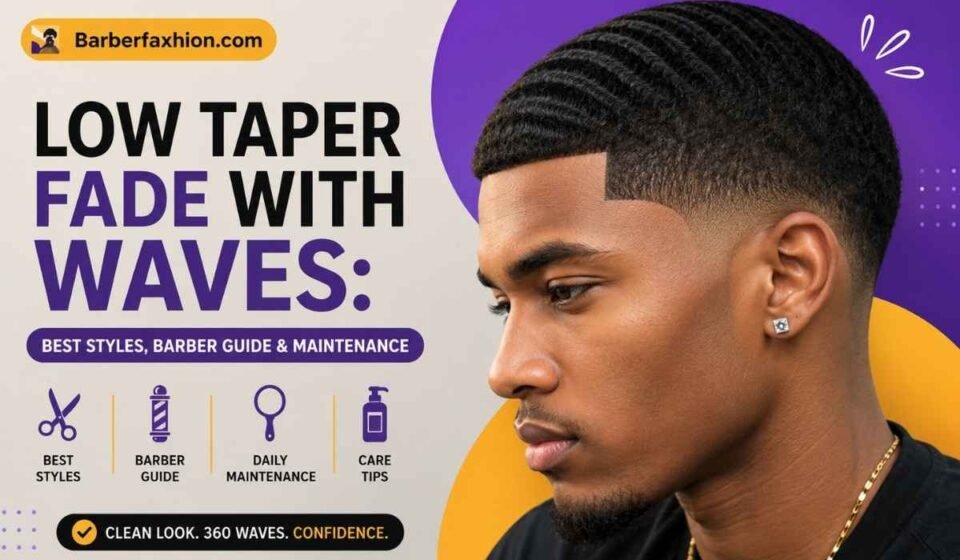

You’ve seen the photos. A guy walks out of the barbershop with his sides cleaned up and a wave pattern rippling off his scalp, and you think, “okay, I need that.” Then you sit down, ask for a low taper fade with waves, and walk out with your pattern half gone and edges that don’t match what you pictured.
That gap comes down to one thing: nobody explained that the taper and the waves are two different jobs. This guide covers both — which low taper fade with waves style suits your hair, what to say to your barber, how to train the waves yourself, and what to do when something goes wrong.
Quick Answer
A low taper fade with waves keeps the shortening confined to your temples, sideburns, and neckline while your trained 360 or 180 wave pattern stays untouched across the top, sides, and back. It suits curly or coily hair best, and it holds up longer between barber visits than a higher fade because less hair gets removed in the first place.
What Is a Low Taper Fade With Waves?
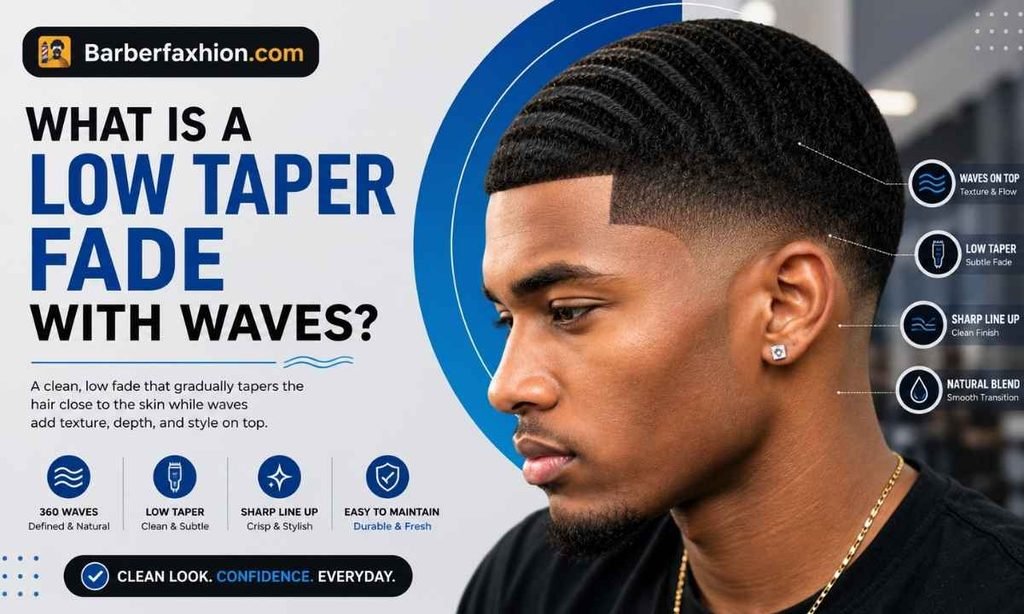
Two separate things happen at once here, and keeping them separate is the whole trick. The taper is the haircut part: your barber gradually shortens the hair around your sideburns and neckline while leaving the top and sides long enough to work with. That’s what gives a low taper fade with waves its soft, blended finish instead of a fade’s harsh line.
The waves aren’t cut in at all. They’re your own curl pattern, trained over time to lie flat and flow in one direction through brushing and consistent compression. A barber sets you up for waves by leaving the right length, but the pattern itself comes from your routine, not the clippers.
“Low” describes where the taper sits. It stays in a narrow band near your hairline instead of climbing toward the crown, so the hair carrying your pattern never gets touched. That’s the entire appeal of pairing these two things together.
One quick warning: barbers use “taper,” “taper fade,” and “low fade” pretty loosely, and the styles genuinely overlap. A low fade also starts just above the ear, but it usually blends harder and drops closer to skin. Bring a reference photo — it does more work than any style name ever will.
Where the Low Taper Starts and Ends
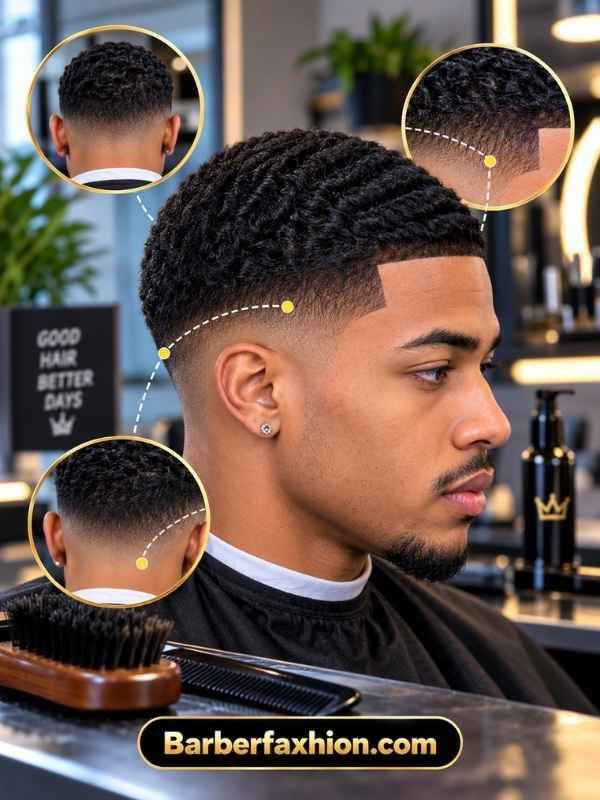
“Low” is a zone, not an exact measurement. In practice, it lives in three spots:
- Temple and sideburn — blended into your natural corner, not shaved to skin.
- Lower neckline — where growth patterns usually need the most cleanup anyway.
- Behind the ear — only if you specifically ask for it.
Everything above that band stays long enough to carry your pattern. Once the blend creeps toward the parietal ridge — the widest part of your head — it’s stopped being low and turned into something else.
How 360 Waves and 180 Waves Work With a Low Taper
Waves start at your crown and spiral outward, which is why every brushing session should begin at that same point. A 360 wave pattern wraps all the way around your head — top, sides, and back — while 180 waves stay concentrated on the front and top only.
That distinction matters when picking a taper height. A 360 pattern runs straight through the sides and back, exactly where most fades remove hair. A low taper sits below that pattern instead of cutting into it. Cut too short on top and the curl has no length left to lie flat into a ridge. Cut too high on the sides and you lose the connection points that make the whole thing read as one continuous wave instead of two disconnected halves.
Is a Low Taper Fade With Waves Right for You?
A low taper fade with waves is built for anyone who wants full coverage across the top, sides, and back without shaggy, uncontrolled edges. Whether you’ll actually get a defined pattern depends on a few things that have nothing to do with the taper itself.
Which Hair Textures Can Form Defined Waves
A real 180 or 360 pattern needs a curl or coil that can be trained to lie flat and repeat itself. Straight hair won’t do this, no matter how much you brush it. Looser wave textures tend to produce something shallower and less connected. Tightly coiled hair usually shows results fastest, since each strand already wants to spiral on its own — which is why this cut is such a popular choice for black hair textures specifically.
Curl-type charts (3A, 4C, and so on) are shorthand, not a diagnosis. A barber who works with textured hair daily will read your growth pattern better in two minutes than any chart could tell you on paper.
How Head Shape, Hairline, and Lifestyle Affect the Cut
A few real-world factors change what you and your barber agree on first: an uneven or receding hairline, a prominent occipital bone, daily contact with a helmet or stiff collar, and how often you can realistically get back in the chair. None rule the style out — they just shape the decisions you make together.
Face Shape and Style Pairing
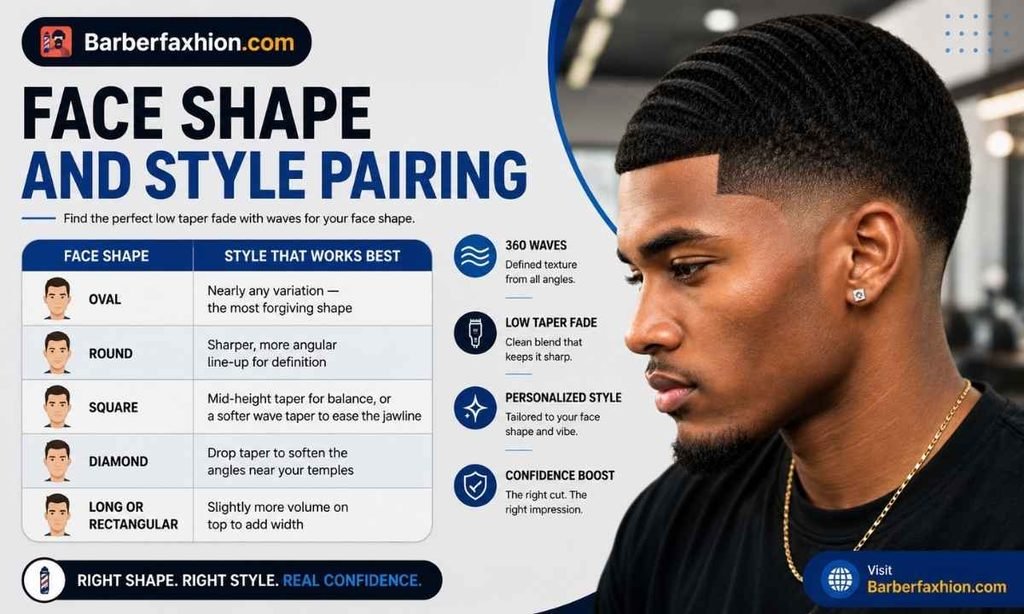
| Face Shape | Style That Works Best |
| Oval | Nearly any variation — the most forgiving shape |
| Round | Sharper, more angular line-up for definition |
| Square | Mid-height taper for balance, or a softer wave taper to ease the jawline |
| Diamond | Drop taper to soften the angles near your temples |
| Long or rectangular | Slightly more volume on top to add width |
What Are the Main Benefits and Trade-Offs?
The benefit of a low taper fade with waves is coverage. It removes less hair from the sides and back than anything else in the fade family, so more of your pattern survives every visit, and it grows out gracefully since there’s no hard contrast line to lose.
The trade-off is that you’re maintaining two things instead of one. The taper softens as it grows, and the waves need their own daily routine that has nothing to do with how your edges were cut.
Which Low Taper Wave Style Should You Choose?
A low taper fade with waves comes in a few variations. Pick based on how much coverage you want, how much contrast you want at the edges, and how your skin handles close cutting.
Low Taper With 360 Waves
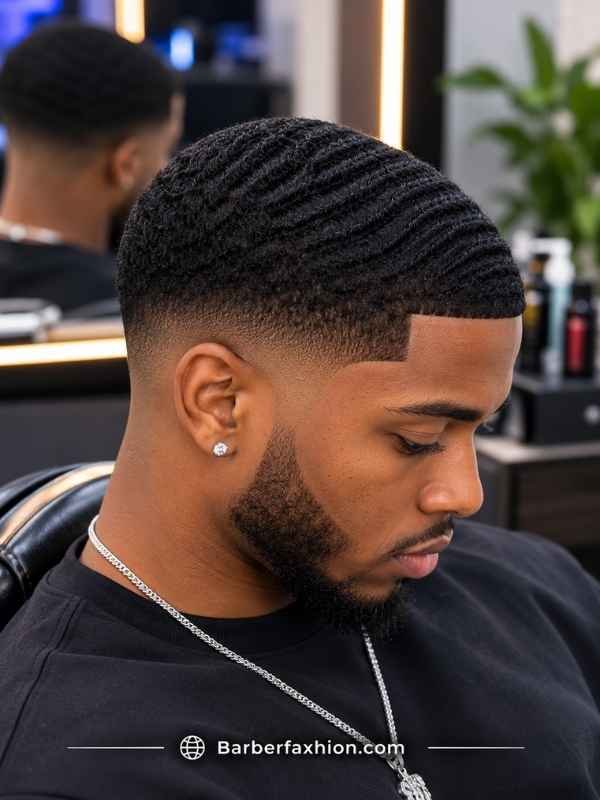
This is the default pick if you’re actively building a full 360 pattern. Removal stays minimal above the temples and nape, so your crown, sides, and back keep flowing together. A front line-up is optional and won’t affect coverage behind it.
Low Taper With 180 Waves
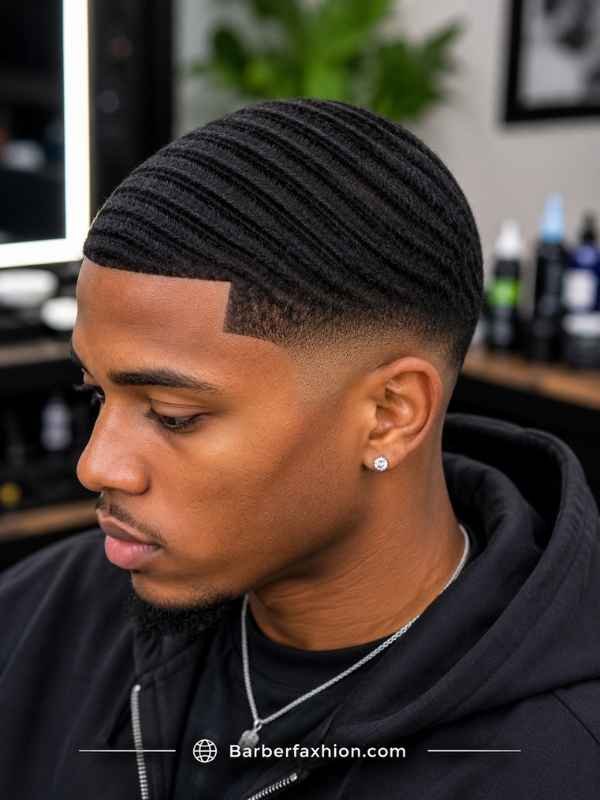
180 waves concentrate on the top and front instead of wrapping your whole head. Since less side and back hair carries visible definition, this version tolerates a bit more shortening at the sides without breaking the look. Solid choice if you’re not chasing a full 360 connection.
Low Taper With a Line-Up, Beard, or Part
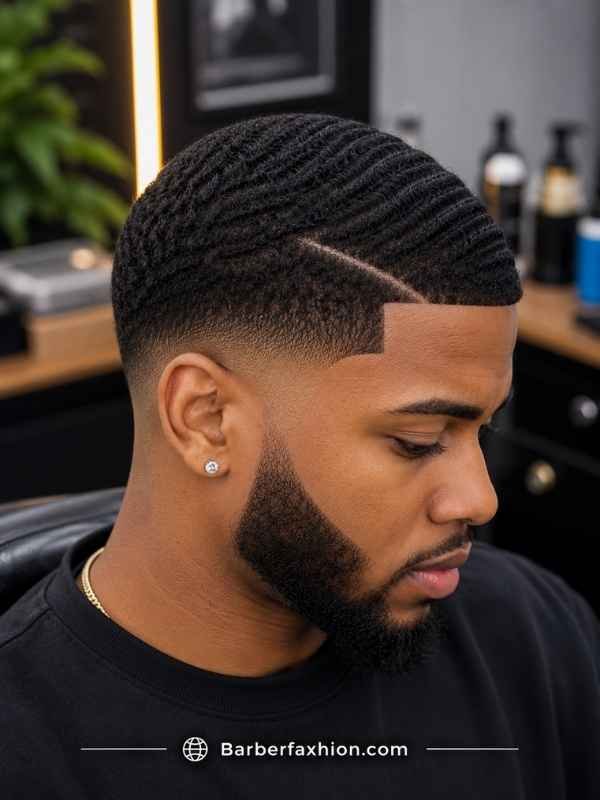
A line-up — a sharp, straight edge cut along your hairline with a razor or trimmer — a beard connection, or a hard part are finishing touches layered on top. None are required for either half of the cut to work. Sharp edge work makes the whole look feel deliberate, but pushing your hairline back for extra crispness changes your outline permanently, so decide on it rather than default into it.
Shadow Taper, Skin Taper, or Temple Taper
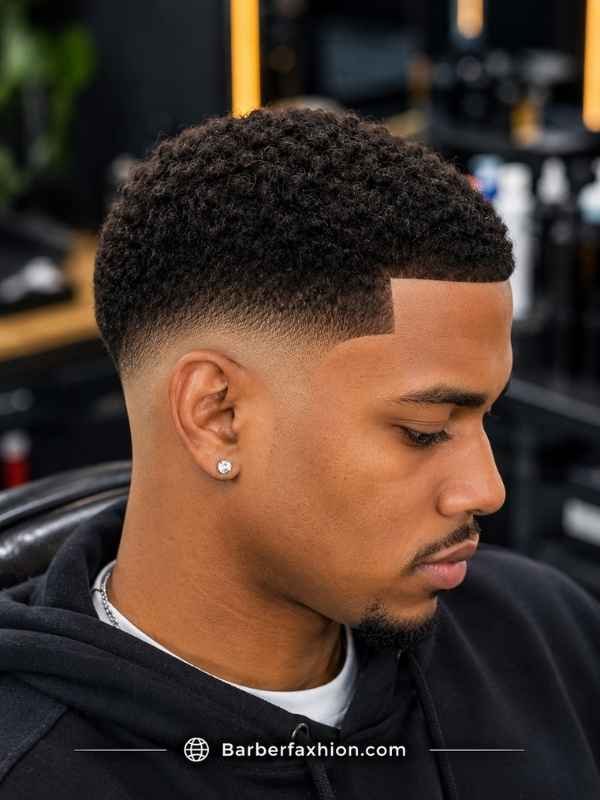
These three differ in how much hair survives at the bottom edge. A skin taper follows the same blend but takes the last stretch down to bare skin for stronger contrast. A shadow taper leaves visible stubble instead — gentler if your skin reacts to close cutting. A temple taper only graduates the temple zone, from your forehead corner back toward your ear, leaving the sides and back untouched, making it the most conservative option. You might also hear “low zero fade” thrown around — that’s shop slang for a skin taper pushed to the shortest guard at the base, basically a low fade taken as close to bald as it goes.
What Should You Ask Your Barber For?
Describe the outcome, not just a style name. Say which length is carrying your pattern and needs to stay, where the taper is allowed to sit, and how you want your hairline and bottom edge finished. Confirm it before the first pass, since corrections are cheap beforehand and nearly impossible after. Treat it as four decisions to say out loud:
- Top length and direction. Give the guard length that’s worked for your waves before, and ask for the top to be cut with the grain — flag this specifically, since it goes against typical clipper technique.
- Taper height. Shortening from the sideburns down and at the lower neckline only, nothing climbing toward the crown.
- Hairline, sideburns, and neckline shape. Natural shape followed exactly, or sharpened up.
- The bottom edge. Skin, a shadow of stubble, or left soft. Mention any history of irritation from close shaving.
On direction, there are genuinely two right answers depending on the goal. Standard clipper technique cuts against the direction of growth for a consistent result, feeding every hair through the guard teeth evenly. Wave-specific guidance flips that — cut with the grain, since going against it disrupts the direction you’ve spent weeks training in. Be clear about which one you want.
What Guard Length Should You Request?
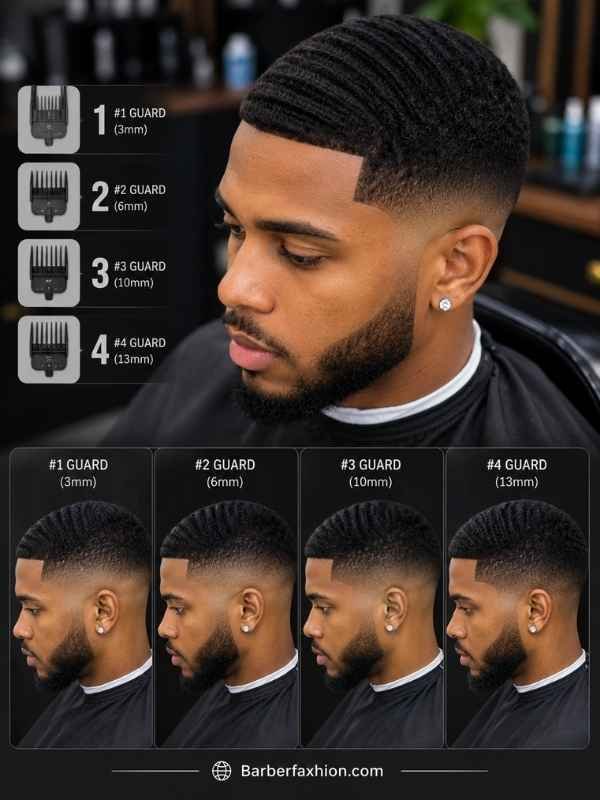
There’s no single right answer, but the general range helps. A #1 guard runs about 1/8 inch, a #2 sits around 1/4 inch. For wave cuts, most barbers land between a #1 and a #2 on top, adjusted for how tightly your hair curls. Bring the length that’s produced good waves for you before — guard numbers aren’t perfectly interchangeable across brands, so your own track record beats a generic number.
What Reference Photos and Checks Prevent Miscommunication?
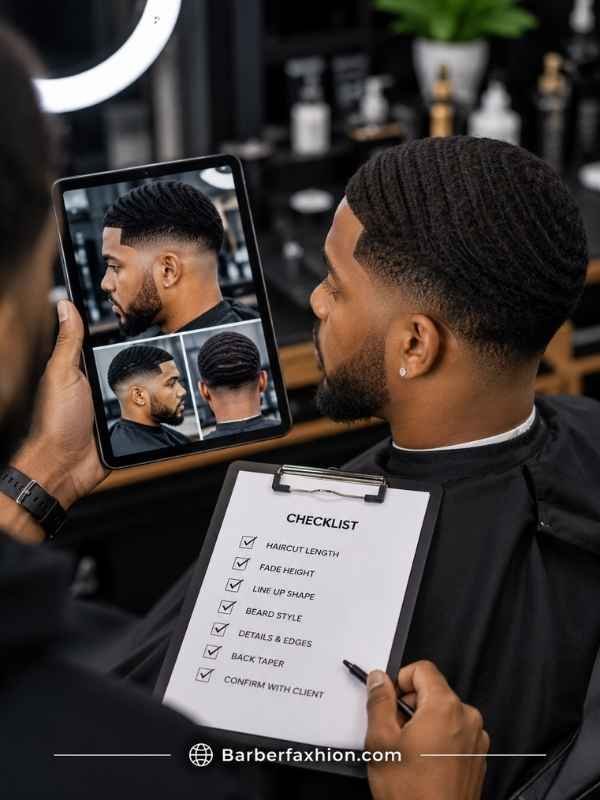
A single front-facing photo can’t show taper height or neckline shape, which is where most disappointing cuts come from. Bring side and back images, point to where the taper should stop, confirm your top length out loud, and restate your finish preference before the clippers turn on.
How Do You Get Waves With a Low Taper Fade?
The taper doesn’t create waves — you do, through consistent directional brushing, moisture, and compression on hair your barber has left at a workable length. Treat it as a daily habit that gets small adjustments as your pattern deepens, not something you buy in a single chair session.
Step-by-Step Wave-Building Routine
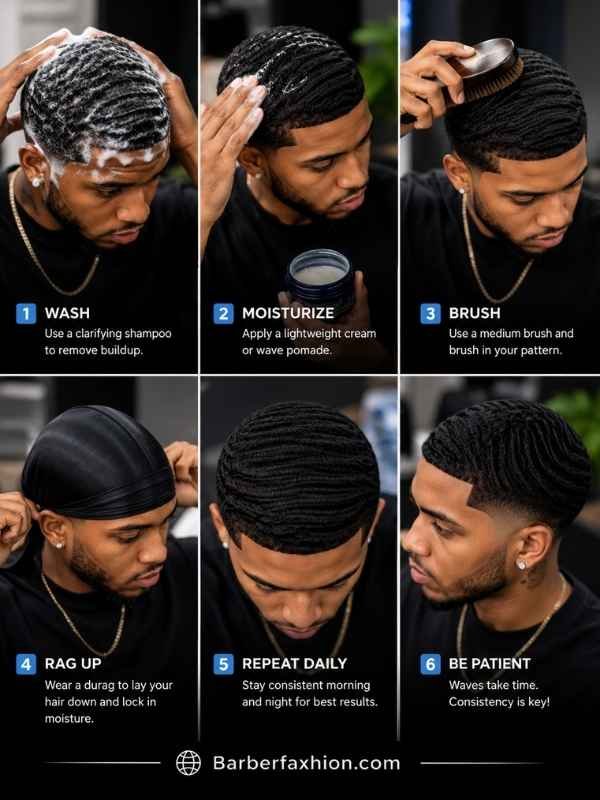
Direction and consistency matter more than any product. Ease up on any step causing pain or scalp irritation.
- Start with a workable top length. Short enough that the curl lies flat when brushed. Hair that’s too long won’t compress into a visible pattern yet.
- Find your crown. Use a handheld mirror, and grab a second one if you’ve got a double crown. Every stroke starts there and radiates out toward your hairline and neckline.
- Brush the same paths every session. Enough pressure to lay the curl down, not enough to scrape your scalp. Two or three short sessions a day is a common starting point.
- Use a small amount of product before brushing. A little pomade or moisturizer helps hair hold direction. Heavier layers mostly build up and don’t deepen the pattern any faster.
- Compress with a durag or wave cap. Snug, not tight. If it’s giving you headaches or leaving marks, it’s too tight.
- Wash out build-up, then re-brush. Start from the crown again, reapply a light hold, and cover it back up.
What Is Wolfing, and When Does It Help?
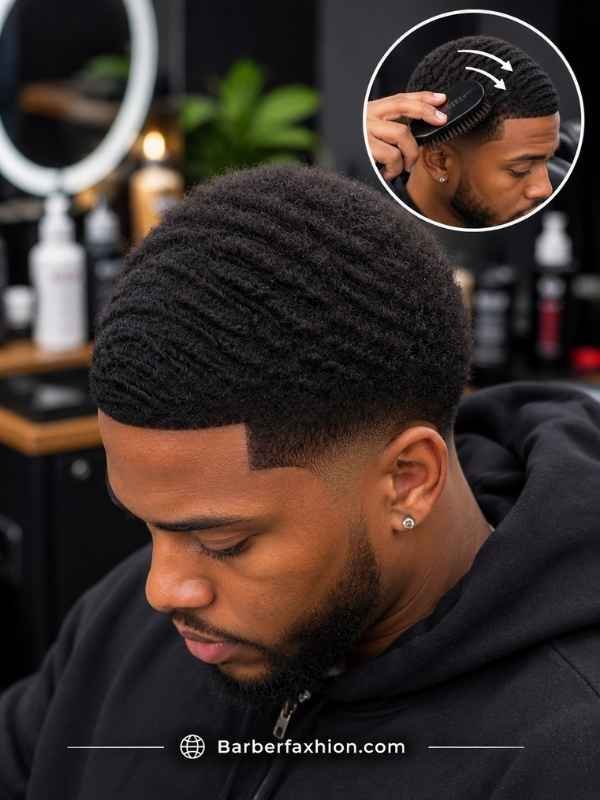
Wolfing means letting your hair grow past its usual cutting length while keeping the full brushing and compression routine going. It isn’t skipping the barber and just hoping. The extra length lets an already-established pattern deepen and connect, which is why it works better once you’ve got visible ripples than as a way to get them started. The top still needs to stay manageable and moisturized, and you can keep getting perimeter clean-ups the whole time you’re wolfing.
How Long Before the Waves Look Defined?
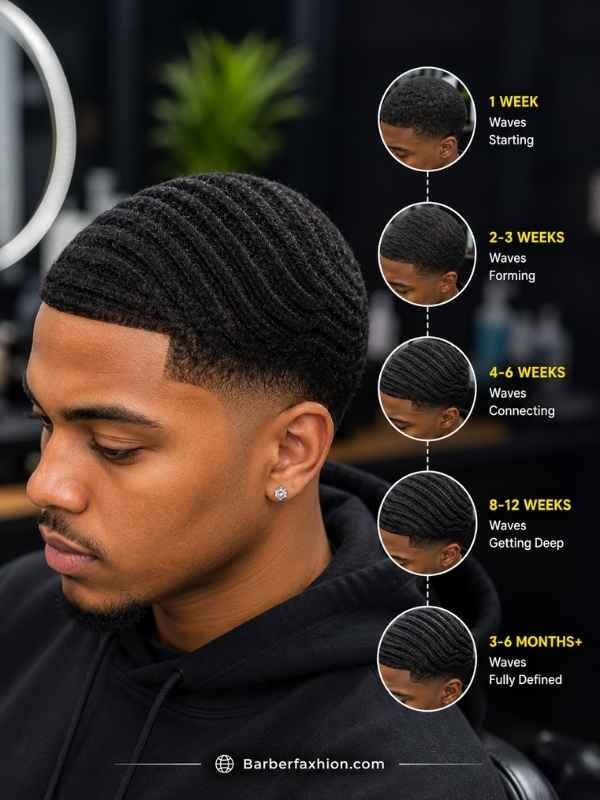
Longer than most guys want to hear. Most practitioner guidance clusters around a few weeks of daily brushing before a shallow pattern shows, and several months before waves look deep and connected. The routine doesn’t stop once you hit a full 360 pattern — you keep it up indefinitely.
Early ripples aren’t the finished product. The only comparison that matters is against your own photos from a month ago, taken in the same lighting and angle.
Products and Tools That Help Build Waves
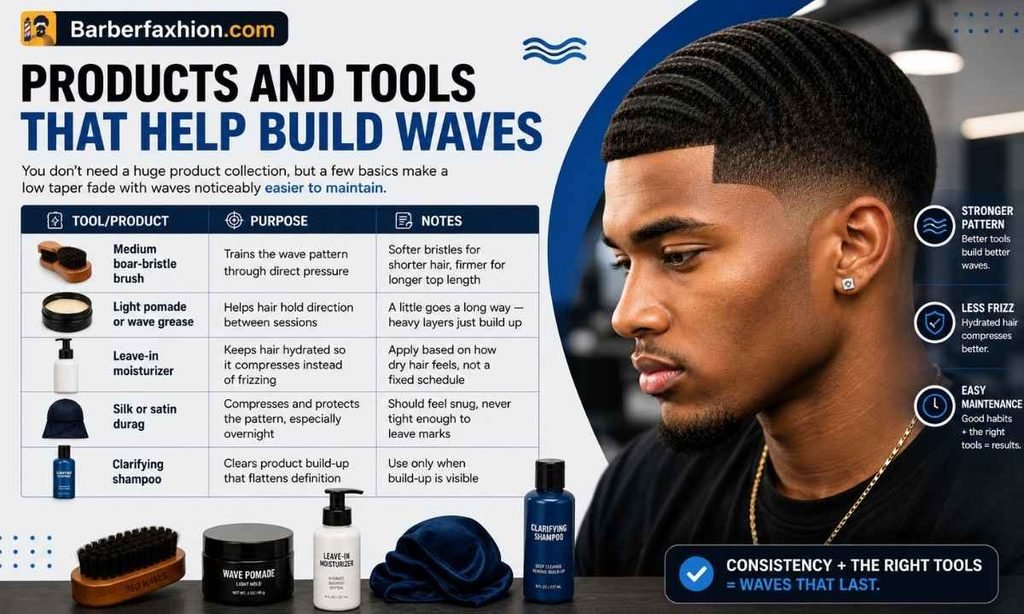
You don’t need a huge product collection, but a few basics make a low taper fade with waves noticeably easier to maintain.
| Tool/Product | Purpose | Notes |
| Medium boar-bristle brush | Trains the wave pattern through direct pressure | Softer bristles for shorter hair, firmer for longer top length |
| Light pomade or wave grease | Helps hair hold direction between sessions | A little goes a long way — heavy layers just build up |
| Leave-in moisturizer | Keeps hair hydrated so it compresses instead of frizzing | Apply based on how dry hair feels, not a fixed schedule |
| Silk or satin durag | Compresses and protects the pattern, especially overnight | Should feel snug, never tight enough to leave marks |
| Clarifying shampoo | Clears product build-up that flattens definition | Use only when build-up is visible |
How Do You Maintain the Cut and the Wave Pattern?
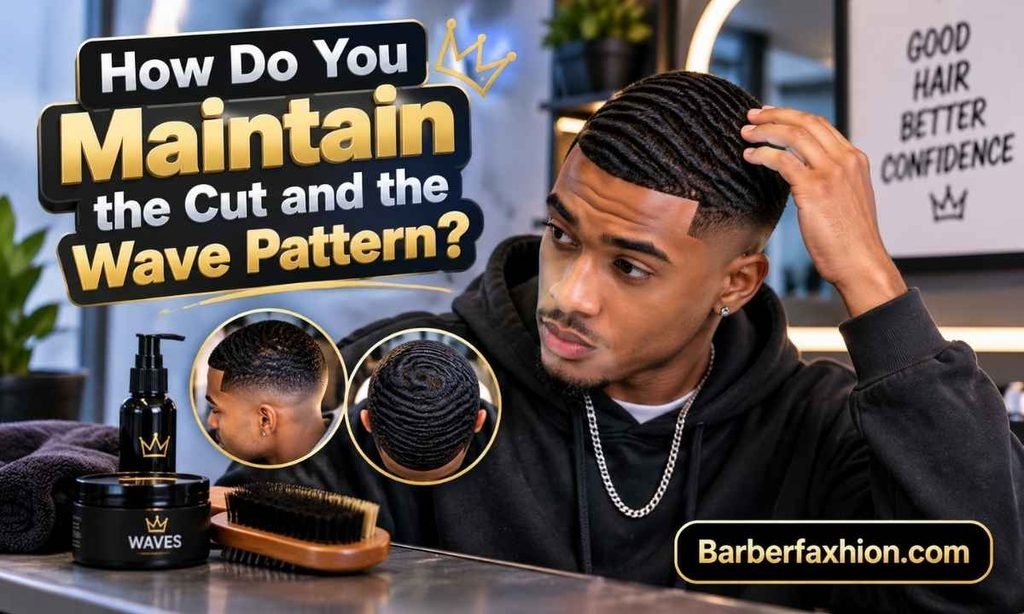
Two maintenance tracks run at once: a daily routine that keeps your pattern trained, and periodic barber visits that keep the taper from turning shapeless. Treat them as one combined job and you’ll usually end up neglecting whichever feels less urgent that week.
Daily and Night-Time Routine
Brush from your crown along established paths, using a bristle firmness that suits your current length. Most people should handle wet hair as little as possible, but tightly curled or textured hair actually benefits from brushing while damp, since it reduces breakage. Apply moisture based on how your hair feels rather than a fixed amount, and keep compression snug instead of punishing.
Washing, Moisture, and Product Build-Up
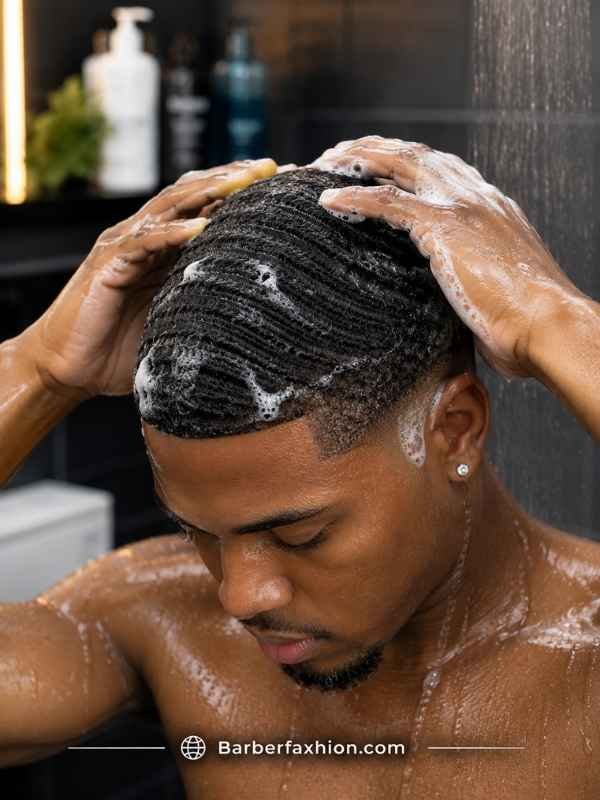
Wash based on sweat, scalp condition, and visible build-up, not a universal schedule. There’s a real tension here: wave routines call for frequent brushing, but heavy daily brushing can cause split ends over time. That’s not a reason to abandon your routine — it’s a reason to keep sessions shorter and gentler, easing off if you notice breakage. Stop using any product that causes ongoing irritation.
Barber Touch-Ups and At-Home Edge Maintenance
Refresh timing depends on growth rate and how sharp you want your edges, not a fixed calendar. Because a low taper removes less hair than a higher fade, it holds shape longer between visits. If you’re wolfing, say explicitly that only the temples and neckline get cleaned up. A longer guard and a light hand on the neckline at home are far safer than trying to recreate a line-up yourself.
Weekly Maintenance Schedule at a Glance
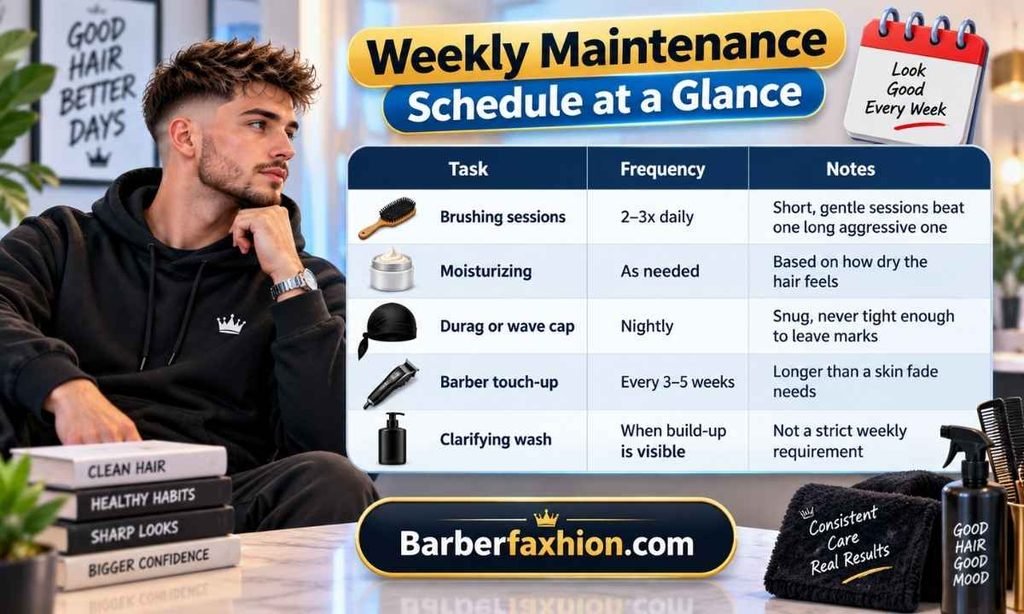
| Task | Frequency | Notes |
| Brushing sessions | 2–3x daily | Short, gentle sessions beat one long aggressive one |
| Moisturizing | As needed | Based on how dry the hair feels |
| Durag or wave cap | Nightly | Snug, never tight enough to leave marks |
| Barber touch-up | Every 3–5 weeks | Longer than a skin fade needs |
| Clarifying wash | When build-up is visible | Not a strict weekly requirement |
How Does a Low Taper Compare With Other Wave Haircuts?
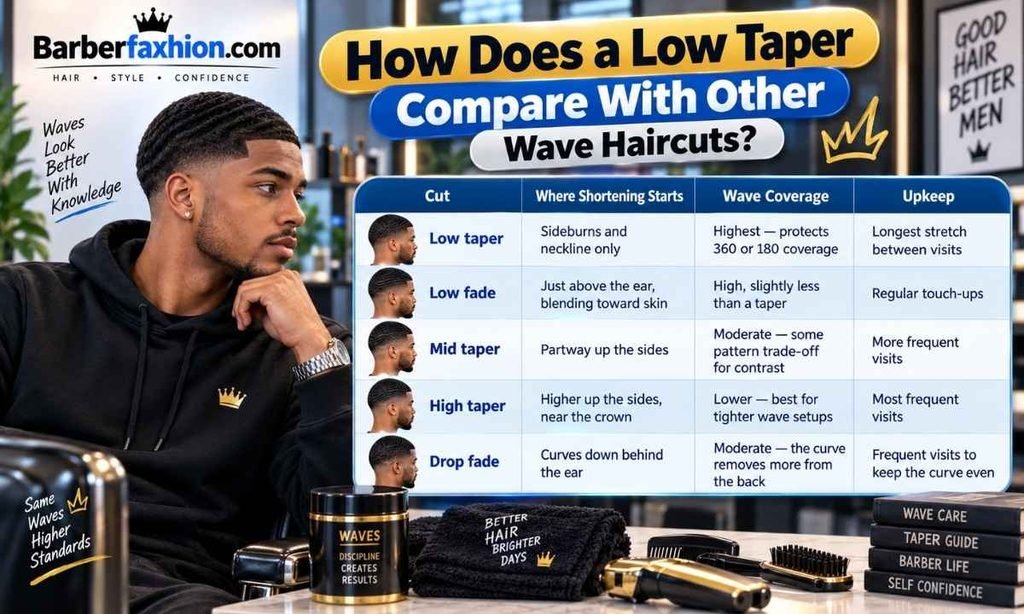
A low taper removes the least hair from your sides and back of anything in the fade family, which is why it’s the default choice for protecting wave coverage. Here’s how a low taper fade with waves stacks up against the alternatives, including mid taper and low fade:
| Cut | Where Shortening Starts | Wave Coverage | Upkeep |
| Low taper | Sideburns and neckline only | Highest — protects 360 or 180 coverage | Longest stretch between visits |
| Low fade | Just above the ear, blending toward skin | High, slightly less than a taper | Regular touch-ups |
| Mid taper | Partway up the sides | Moderate — some pattern trade-off for contrast | More frequent visits |
| High taper | Higher up the sides, near the crown | Lower — best for tighter wave setups | Most frequent visits |
| Drop fade | Curves down behind the ear | Moderate — the curve removes more from the back | Frequent visits to keep the curve even |
None of these is objectively better. A low taper protects wave-bearing hair most effectively, while the rest trade coverage for sharper contrast. Maximum coverage with minimal upkeep points to a low taper; more visible contrast and extra barber trips points toward mid or high.
If you’re curious about the mid taper option mentioned above, see our full guide on mid taper haircuts for styles and inspiration.
What Can Go Wrong, and How Do You Fix It?
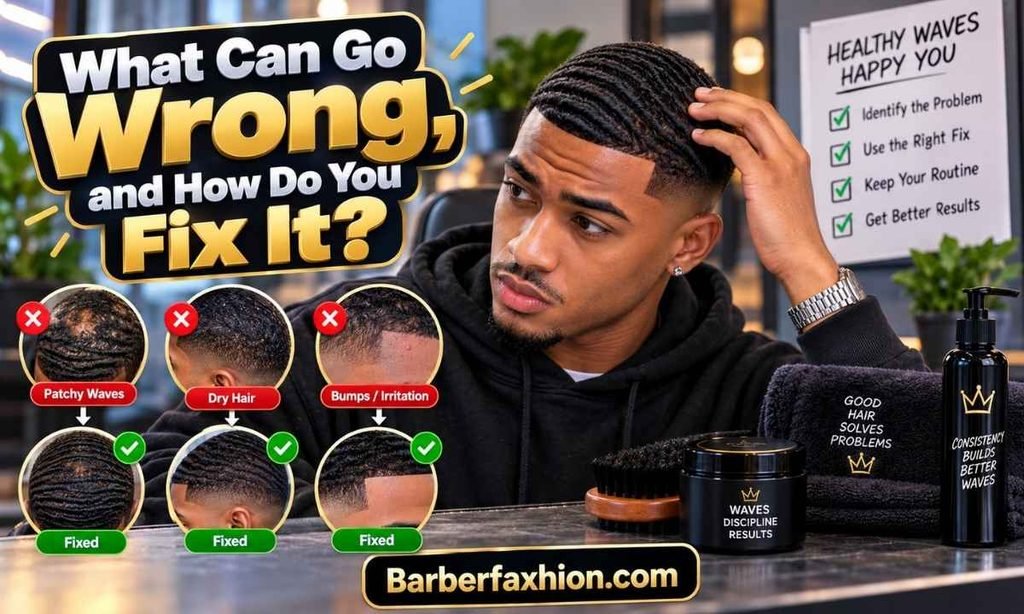
Problems fall into three buckets: too much wave-bearing hair removed, edge work that doesn’t match what was asked for, and skin irritation from close cutting. None are permanent, but none fix themselves overnight either.
The Barber Cut Too High or Too Short
Lost length can’t be restored, so the fix is time and restraint. Photograph the cut as a record of what to avoid next time. Resist evening up the other side for symmetry — every correction removes more hair. A shadow taper can soften contrast while the area grows back, and telling your next barber which zones you’re regrowing prevents a repeat.
Razor Bumps, Neck Irritation, and Scalp Warning Signs
Bumps at the neckline usually trace back to close cutting against the direction of hair growth. General prevention advice stays consistent: shave in the direction hair grows, shave when hair is soft, use a moisturizing shaving product, and keep tools clean.
Separately, close-shave cuts combined with friction from helmets or hard hats can occasionally trigger a skin condition at the back of the neck. Worth clearing up a common myth — dirty clippers don’t cause this, and it isn’t contagious. If bumps persist or scar, see a dermatologist instead of treating it at home.
Receding Hairlines, Uneven Crowns, and Sensitive Skin
None of these rule out a low taper fade with waves — they just change what you should ask for. A receding or uneven hairline is usually better served by following its natural shape than manufacturing a lower one. A double or off-center crown needs its own brush mapping instead of a generic outward pattern. If you’re prone to bumps, a shadow finish and natural line-up cut down how often that sensitive area gets touched.
Common Mistakes to Avoid
- Letting the taper creep too high — once it climbs toward the crown, it’s not a low taper anymore.
- Brushing without a consistent starting point — always begin at the crown.
- Skipping compression — no durag or wave cap means your pattern won’t hold overnight.
- Overloading on product — heavy pomade builds up and flattens definition instead of deepening it.
- Waiting too long between edge clean-ups while wolfing — the top can grow, but the neckline still needs attention.
A low taper fade with waves is the safest bet if coverage matters more than sharp contrast.
Frequently Asked Questions
What fade looks best with waves?
A low taper fade with waves protects the most side and back coverage, making it the top pick if you want to keep a full 360 or 180 pattern intact. If you want more visible contrast and don’t mind frequent touch-ups, a mid taper or low fade works too.
Is a low taper fade good for waves?
Yes. A low taper fade with waves removes the least hair of any fade style, leaving wave-bearing hair on the sides and back completely untouched — exactly what a developing or established pattern needs.
Is a low taper better than a low fade for 360 waves?
A low taper generally keeps slightly more side and rear hair than a low fade, which tends to blend harder and drop closer to skin. Which one’s better depends on what you’re optimizing for — maximum wave coverage, or a bit more visible contrast at the edges.
How often should a low taper fade with waves be refreshed?
There’s no fixed interval — it depends on your hair’s growth rate and how sharp you want the edges. Because a low taper removes less hair than higher fades, most guys stretch further between visits, especially while wolfing the top.
Can you keep wolfing while tapering the temples and neck?
Yes. Plenty of guys leave the top and upper sides untouched for weeks while only getting the temples and neckline cleaned up. Say explicitly that the top is off-limits, since a default blend can creep into wave-bearing hair without that instruction.
Conclusion
A low taper fade with waves works because it treats two separate jobs as two separate jobs. The taper shapes your edges without touching the hair that carries your pattern. The waves themselves come from your natural texture, a barber who protects the right length, and a routine you stick with — including the days you don’t feel like brushing.
Before your next appointment, settle your top length, taper height, hairline treatment, and finish, and bring side and back photos so nothing gets left to interpretation. If a cut ever comes out shorter than planned, protect what’s left, keep brushing, and let it grow back before the next visit.